

1. Install CVSNT from http://www.march-hare.com/cvspro/#free and Select Complete Install and Install it on your Windows XP box.
2. Create CVS directories
Create two directories on the target machine, c:\cvsrepos and c:\cvsrepos\cvstemp. If you have a separate disk partition to spare for CVS then use that instead. The important point here is that the disk where the repository is located on is NTFS.
3. Directory security and permissions
Give c:\cvsrepos\cvstemp security settings that allows full control for all accounts including SYSTEM.
Important:
The cvstemp directory must NOT be located in either c:\WINNT\Temp or anywhere in the "C:\Documents and Settings" tree because these locations have imposed restrictions on user access!
2.
3. Shut down the CVSNT service
Check that the CVSNT Service is not running (Start button is enabled). This is the initial screen showing that both services are running:
![clip_image002[1]](https://sharat.files.wordpress.com/2008/05/clip-image0021.jpg)
4. Repository creation
The tab will initially look like this:
![clip_image004[1]](https://sharat.files.wordpress.com/2008/05/clip-image0041.jpg)
5. Add repository
Now you will add a repository to the server. This is done using the "Add" button. When you click this a dialogue shows up where you will define your repository.
![clip_image006[1]](https://sharat.files.wordpress.com/2008/05/clip-image0061.jpg)
![clip_image008[1]](https://sharat.files.wordpress.com/2008/05/clip-image0081.jpg)
6. Name repository
Now fill in the description and the name of the repository as well.
NOTE:
Do NOT accept the suggested name, which is the same as the folder path!
Instead only use the bare folder name with a leading / like this:
![clip_image010[1]](https://sharat.files.wordpress.com/2008/05/clip-image0101.jpg)
7. Initializing the repository
When you click the OK button there will be a dialog where CVSNT offers to initialize the new repository.
When you click Yes then the new folder will be converted to a real repository:
![clip_image012[1]](https://sharat.files.wordpress.com/2008/05/clip-image0121.jpg)
8. First repository added!
Now the list of repositories has been populated with the first repository:
9. ![clip_image014[1]](https://sharat.files.wordpress.com/2008/05/clip-image0141.jpg)
You can add as many as you like (almost) but please do not fall for the temptation to use one repository for each and every project! There are a lot of possibilities to streamline the development process using CVSNT, but many of these use the virtual modules concept and this is only possible within a single repository.
10. Server Settings
Now go on to the Server Settings tab.
Here the default settings are all right for now, except the Temporary Directory setting.
![clip_image016[1]](https://sharat.files.wordpress.com/2008/05/clip-image0161.jpg)
NOTICE about Domains:
You can set the Default domain entry to either the CVSNT server PC name (as in the example above) or the domain name to which the CVSNT server belongs. CVSNT will strip the domain part from all accounts that log on using the default domain before processing. All other logons will be processed using their complete names (DOMAIN\username). The result of this is that all users that "belong" to the domain specified in this box will be logged using only the account name, likewise these usernames will be supplied to the administrative scripts without the domain name. All others will have a domain name added. This must be accounted for in any admin script used.
The CVSROOT/users file is one such admin file that needs to be handled with care concerning domain and non-domain entries.
Temp dir: Use the ellipsis button to browse for the folder prepared for this purpose above:
![clip_image018[1]](https://sharat.files.wordpress.com/2008/05/clip-image0181.jpg)
11. Compatibility
On the next tab (Compatibility Options) there is nothing you need to change for now:
![clip_image020[1]](https://sharat.files.wordpress.com/2008/05/clip-image0201.jpg)
12. Plugins and protocols
The Plugins tab define a lot of the extra features of CVSNT including some aspects of the connection protocols. The sceen list the available plugins and when you select a line you will be able to configure this plugin by clicking the configure button:
Keep default settings…
![clip_image022[1]](https://sharat.files.wordpress.com/2008/05/clip-image0221.jpg)
13. Advanced settings
The final tab on the Control Panel deals with advanced configuration settings and you need not change anything here.
Keep Default Settings….
![clip_image024[1]](https://sharat.files.wordpress.com/2008/05/clip-image0241.jpg)
14. Apply configuration changes
Now click the Apply button! This is really important, nothing will happen unless you do this! Note that after you have done this the Apply button is disabled.
15. Start the CVSNT service
Go back to the first tab and click the Start button. After a few moments the Stop button will be highlighted.
Now CVSNT runs (success!)
15.Restart the server
In order for you to be able to use the command line cvs you need to have the path variable set to include the location of the cvs.exe just installed (c:\programs\cvsnt). Since the installer will have put this into the system path variable it will work if you restart the server.
You can check this by going to a command window and typing the command: cvs –ver
Adding and managing CVS users for pserver
1. Creating CVS accounts on the server
In order for pserver and sserver to work you have to define CVS users, but before you can do this you need to create two real accounts on the server. These accounts will be used by the CVS users as the working accounts.
You need one account which will be a CVS administrative account and one which will be a normal user account. Note that the CVS administrator need not be a server administrator!
![clip_image026[1]](https://sharat.files.wordpress.com/2008/05/clip-image0261.jpg)
The two accounts are added through the Users dialog in Computer Management.
I have used the account names cvsadmin and cvsuser as shown above.
2. Adding CVS users
Open a command window and do the following (replace items <text> with the real values from your system).
![clip_image028[1]](https://sharat.files.wordpress.com/2008/05/clip-image0281.jpg)
![clip_image030[1]](https://sharat.files.wordpress.com/2008/05/clip-image0301.jpg)
Here don’t worry too much about sspi. We are doing this process for pserver protocol only. Do what it says.
You will now be asked to enter a password for this user. This password is only for CVS use so it should not be the real system password! Enter the password twice.
Now the CVSROOT/passwd file will be created and the user you entered will be added to the list in this file.
This step is necessary if you are going to use the pserver
Creating Admin File:
- Create a text file called admin (no extension) inside the CVSROOT directory of the repository. That is C:\cvsrepos\MyCode\CVSROOT
- Edit this file by adding on separate lines the login names of the users you want to give administrative priviliges on the CVS server.
The file could look like this:
cvsadmin
Make sure you won’t create a .txt file. It shouldn’t contain any extension. If you don’t know how to create a file with no extension, copy one of the existing file and rename it as admin and remove its contents and above content. Still you can’t do this, Buy a computer professor CD from walmart and learn it. J (nice idea!! Right)
Giving Permissions to CVSAdmin User:
Give Permissions to cvsadmin user on cvsroot directory.
C:\cvsrepos\MyCode\CVSROOT : right click and add cvsadmin user and give full permissions.
![clip_image032[1]](https://sharat.files.wordpress.com/2008/05/clip-image0321.jpg)
Adding new users to the CVS:
1. Open the command prompt and set the cvsroot for cvsadmin user.
![clip_image034[1]](https://sharat.files.wordpress.com/2008/05/clip-image0341.jpg)
2. Now login into CVS with cvsadmin user.
Type cvs login on the command promt and enter password of cvsadmin user. This user is your System user that you created above. (System password of cvsadmin).
![clip_image036[1]](https://sharat.files.wordpress.com/2008/05/clip-image0361.jpg)
Create CVS Users as many as you want:
Type below command and give the name of the user you want to use.
C:\>cvs passwd -r cvsadmin -a thamos
It will ask for a password for two times, Give it whatever you want for this user.
![clip_image038[1]](https://sharat.files.wordpress.com/2008/05/clip-image0381.jpg)
Very nice!! So far you have added CVS Users in to the system.
5. Testing the CVS connection with pserver:
Set the CVS Root:
C:\>set cvsroot=:pserver:thamos@sharatlaptop:/cvsrepos/MyCode
![clip_image040[1]](https://sharat.files.wordpress.com/2008/05/clip-image0401.jpg)
Open another command window and type: set cvsroot=:pserver:thamos@sharatlaptop:cvsrepos/MyCode
Then: cvs login (enter password on prompt) cvs ls -l -R
(this should give you a list of the files in C:\cvsrepos\MyCode)
Awesome!! You did a great job so far.
If you cannot get this far, for example if the login fails, then you should check the Windows Firewall settings on the CVSNT server:
7. Modifying Windows Firewall to allow CVS calls
- Go to Control Panel
- Open the Windows Firewall item.
- Select the Exceptions tab
- Click the "Add port" button
- Enter the name CVSNT and port number 2401 as a TCP port
- Accept back to the main screen
- Make sure Windows Firewall is set to ON
![clip_image042[1]](https://sharat.files.wordpress.com/2008/05/clip-image0421.jpg)
![clip_image044[1]](https://sharat.files.wordpress.com/2008/05/clip-image0441.jpg)
![clip_image046[1]](https://sharat.files.wordpress.com/2008/05/clip-image0461.jpg)
Integrating with JDeveloper 10.1.3
Open JDeveloper:

To configure JDeveloper to use CVS:
- Choose Tools
 Preferences, then select Extensions from the left panel of the Preferences dialog.
 - In the right panel, ensure that Versioning Support n.n is checked.
- In the left panel of the Preferences dialog, open the Versioning node and then the CVS node. The main CVS preferences panel is shown. Other CVS preferences panels are shown when you click on the items beneath the CVS node.
- Make changes to the preferences as required. For more information about the specific preferences, press F1.
- Click OK to close the Preferences dialog.


Make sure here it is selected as External Executable.
Connecting to a CVS repository
You connect to a CVS repository through the CVS Connection wizard, which you can open from the CVS Navigator by selecting CVS, then clicking the right mouse button and choosing New CVS Connection.


Click on TestConnection.

Give the user password.


Now you must be doing this, to check some project/files. So open your java project in JDeveloper.

Now Click on Versioning and Click on Import Module.


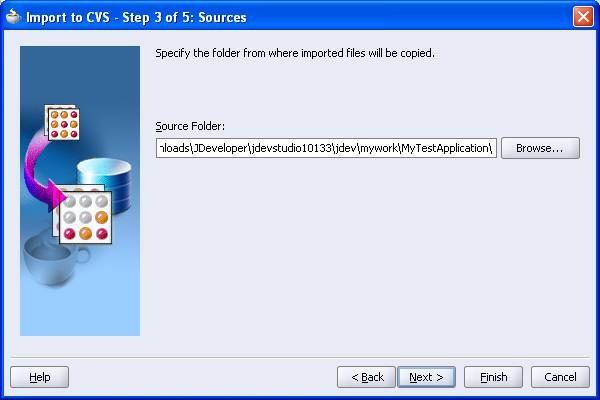


Say YES

No change some part of your code in the Test JSP file.


Now Save the file and Click on Commit.

As this is the first time, you have to all folders.

Commit until workspace folder.

NOW LOGIN AS A DIFFERENT USER and See IF HE CAN COMMIT AND UPDATE THE FILES
Before setting it up for second user, remove first user stuff from Jdeveloper IDE.
1. Remove CVS Connection.


Now JDEV will be like this:

Here you go:

Now get the cvs connection using second user login: babu

Here there is one catch: If the user name you gave it has john and if you type here as John
Here (small) j VS (caps)J. It will fail. User name is also case sensitive. I know you love this tip!!


Click on Test Connection:

Now you can see the JDev like this:

Now checkout the module:


Make sure u check out to the JohnWork folder (some folder) Because u are testing it for two user from the same box.
Once you check out, see the application navigator. You got the code commited by previous user.

Now open testfile.jsp and change something to :

Now Save the file and commit:


Now you can see version got changed to 1.3 (or some number) to testfile.jsp.

Check the version history of the testfile.jsp:


You are done… have a wonderful day……..
Filed under: CVS | 6 Comments »
